Resizing images to avoid distortions

When working with an image in a word processor, presentation software or similar you may need to change its size in order to make it bigger or smaller. But careful, because many times that may affect the image because if you do not do it correctly you may distort (altering the proportions) the image.

See the examples.

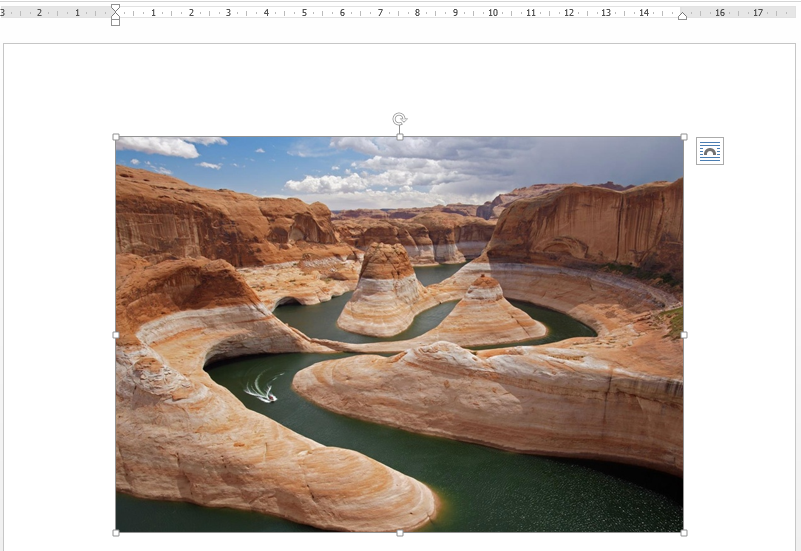
This is the image as saved in the computer and inserted in the document. Check out the width of the image in the upper bar.

1.png

This is if we stretch it from one of the sides. It is clear that the image has the same height but different width.

3.png

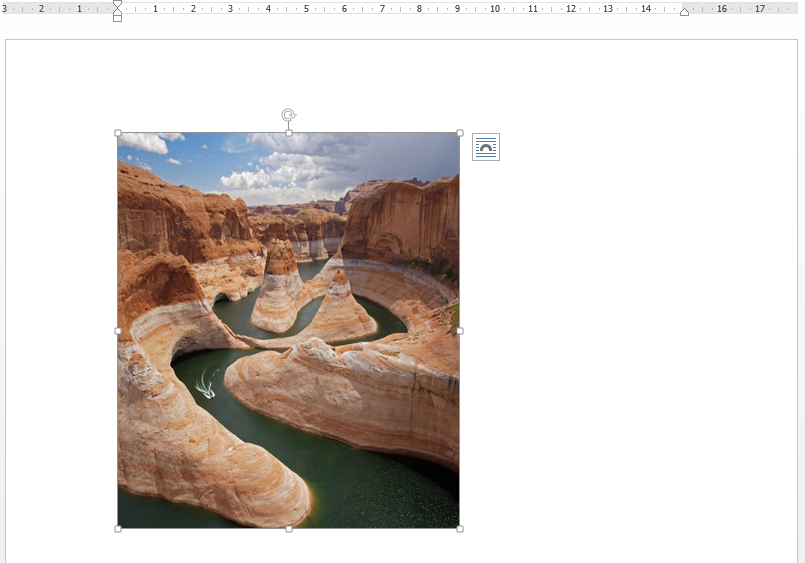
This is if we stretch it from the top or bottom. It does not look right, doesn’t it?

2.png

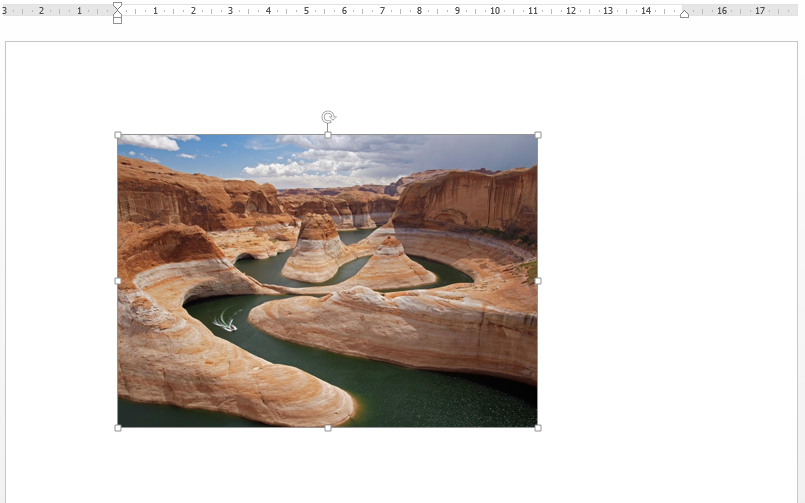
So, for avoiding this distortions, make it larger or smaller stretching from the corner of the image. Here you can see how the image is smaller, but the proportions are correct.

4.png

*** Failing to do this will mean that your grade of the project will be reduced.

Choosing high-resolution images

High-resolution images are very important in a presentation or in a project, because if we have chosen a picture is because we consider it very relevant for illustrating the point we want to make. And we want this images to look GREAT.

Therefore, we have to learn how to look for large images:

Once you have found the image, and it will open in a new tab. Once you have it in the new tab click with the right button and save it (‘Guardar imagen como’) in a folder of your computer.

If you have selected a very large image, it is possible that when inserting it on the presentation it is just too big. Click with the right button of the mouse on ‘Formato de imagen’, ‘Tamaño’, and make it smaller. Or follow the instructions for resizing images.

This is a comparison between a low-resolution (245×259) and a high-resolution (1828×1932) image when inserted in a Word document with the same size (15 centimetres wide).

Rubric – Grading the oral presentation

Here you have what I am going to use for grading your oral presentations, so you can know in advance what to expect. Click on the image for downloading the PDF document.

Sin título

The instructions for the oral presentation here as well: Instructions for the oral presentation in the classroom.

  • Around 10 minutes maximum.
  • All members of the group should participate, so, organise properly.
  • Do not read the presentation, look at the audience, move your hand, do not stay rigid, speak in a good volume, pronounce the best you can, etc.
  • You will be required to be able to communicate orally the necessary elements of the project, commenting maps and graphs.

Model for the test

Here you have the model (Word document. If you need other format, please, write me an -e-mail) for the test that you have to ellaborate for this project in order to grade your classmates about your presentation.

Model for test

The instructions for the test are here again, just in case: Instructions for the test:

In addition to the presentation, there will be an extra of five minutes for completing a test about the presentation.

  • Elaborated and corrected by each group. The grades will be communicated to the teacher.
  • The elaboration and the answer to the other tests will be taken into account in the final grade of the project.
  • It should include 10 multiple-choice questions, treating as many aspects of the presentation as possible.
  • Try organising the answers like this:
    • the right answer.
    • one that is close but not true.
    • one related with the topic but clearly wrong.
    • one which does not make sense.
  • Try asking general questions about the presentation, not about specific dates, names or quantities.

Taking screenshots (screen captures)

When doing a project you may find the situation in which you are required to take a screenshot or screen capture, that is, take whatever appears in your screen and converting into and image.

When doing them for a presentation for school do no use your mobile phone since you will be required to project the image on a large screen. Therefore, go to your computer or laptop for but when you work on a presentation to be projected in a big screen.

So, go to your computer or laptop and follow these easy steps:

  1. Find whatever you are looking for, and make sure there is nothing obstructing the image, including the arrow (puntero).
  2. With laptop: Press the button ‘Fn’ (bottom-left of your keyboard) and the ‘Fin/ImprPant’ (top-right) at the same time.
    • With PC: press the button ‘Alt’ and ‘Impr Pant’ (top right of the keyboard) at the same time.
  3. Open Paint, and paste it pressing ‘Ctrl’ and ‘V’ or clicking with the right button of the mouse and ‘Pegar’.
  4. There you have the image. Now, crop it (córtala) so the explorer bars at the top and bottom of the image do not appear. You can also crop it leaving only whatever you need.
  5. Save it, with a name.
  6. Insert it in the presentation.

* You can also paste it (step 3) straight in the document (Word) or presentation (Power Point) you are using, and then crop it (step 4).

** If you use a Mac computer go to this link for instructions.